Introduction
Windows 11 users occasionally encounter authentication and sign-in errors that prevent them from accessing their devices. One such frustrating error is Error Code 0x80080005, which typically indicates an “Access Denied” message when attempting to sign in or during Windows Update processes. This error can stem from corrupted system files, disabled Windows Update services, recent security patches, or profile corruption issues.
In January 2026, Microsoft released security updates (KB5074109) that inadvertently caused authentication failures in several user environments. The good news? This error is fixable with the right troubleshooting steps. Whether you’re facing this issue after a recent update, due to corrupted files, or from antivirus interference, this guide will walk you through eight proven solutions to restore access to your Windows 11 device.
Understanding Windows 11 Error 0x80080005
Before diving into solutions, it’s important to understand what this error means and why it occurs.
What Does Error 0x80080005 Mean?
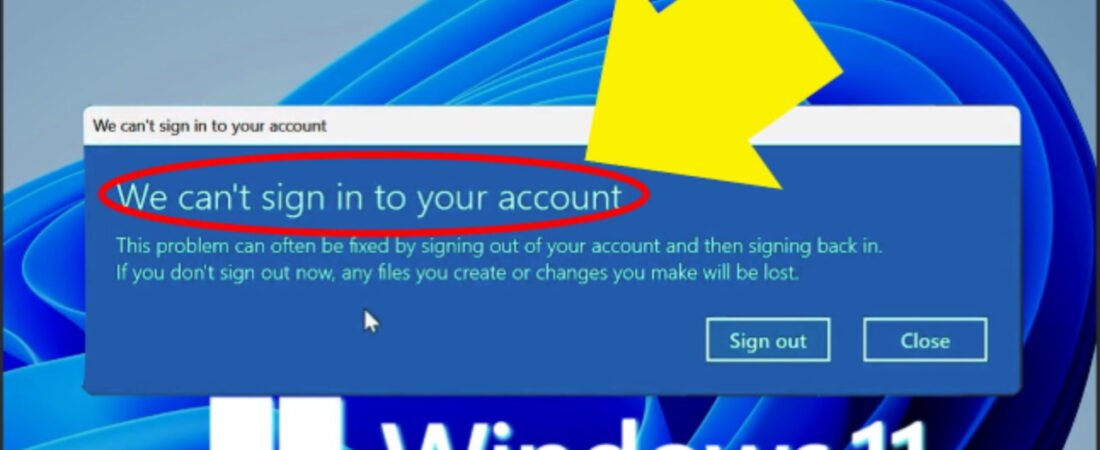
Error 0x80080005 is a Windows system error that translates to “Access Denied.” This error prevents your system from completing critical operations—whether signing in to your account, installing updates, or accessing system resources. The error code itself is part of Windows’ HRESULT error code system, where the first two digits (80) indicate a failure, and the remaining digits specify the exact issue.
Common Causes of This Error
Understanding the root cause is essential for implementing the right fix:
| Cause | Description | Severity |
|---|---|---|
| Corrupted System Files | Damaged Windows system files preventing proper authentication | High |
| Windows Update Service Issues | Disabled or malfunctioning update services blocking access | High |
| January 2026 Security Updates | KB5074109 caused authentication failures in Credential UI | Medium |
| Antivirus/Firewall Interference | Third-party security software blocking legitimate processes | Medium |
| User Profile Corruption | Damaged user profile data preventing sign-in | High |
| Internet Connection Issues | Microsoft account authentication requires online connectivity | Medium |
| Outdated Windows 11 Version | Missing critical security patches needed for authentication | Low |
| Registry Errors | Incorrect registry entries affecting authentication services | Medium |
The January 2026 security incident affected Windows App authentication specifically. Microsoft released an out-of-band fix (KB5077744) on January 17, 2026, and has confirmed the permanent resolution will be included in the February 2026 regular Windows Update.
Prerequisites Before You Begin
What You’ll Need
- Administrator access to your Windows 11 device
- At least 10 GB of free disk space for system repairs
- Internet connection (for some solutions and downloading patches)
- 30-45 minutes to complete the troubleshooting process
- USB drive (8GB+) for advanced recovery options (if needed)
- Another device (computer or laptop) for downloading ISO files or accessing Microsoft account recovery
Important Safety Notes
- Back up your important files before attempting system repairs
- Disable antivirus software temporarily during troubleshooting—this won’t leave your system unprotected indefinitely
- Close all open applications before starting any fixes
- Follow each step in order; don’t skip steps
- Restart your device after each method if directed
Method 1: Install the Latest Windows Update (KB5077744)
This is the first and most direct fix if you’re experiencing error 0x80080005 after January 2026 updates.
Step 1: Boot into Safe Mode
- Press the Windows key + L to access the lock screen
- While on the lock screen, hold the Shift key and click the Power button (bottom right corner)
- Select Restart while still holding Shift
- When your computer restarts and shows the “Choose an option” screen, click Troubleshoot
- Select Advanced options → Startup Settings → Restart
- Your computer will restart again. Press F5 or 5 to enter Safe Mode with Networking
Step 2: Download and Install KB5077744
- Once in Safe Mode, open Microsoft Edge or your browser
- Visit the Microsoft Update Catalog website
- Search for KB5077744
- Download the appropriate file for your Windows 11 version (Home, Pro, Enterprise)
- Run the installer and follow the on-screen prompts
- Restart your device when prompted
Step 3: Verify the Fix
- Log in to your Windows 11 account normally
- Check if you can sign in without encountering the 0x80080005 error
- If the error persists, proceed to Method 2
Time to Complete: 15-20 minutes
Method 2: Reset Windows Update Components
This method addresses the core cause of error 0x80080005 by resetting the Windows Update services that may have become corrupted or disabled.
Step 1: Open Command Prompt as Administrator
- Press the Windows key on your keyboard
- Type cmd and you’ll see “Command Prompt” in the search results
- Right-click on Command Prompt and select Run as administrator
- Click Yes in the User Account Control (UAC) dialog that appears
Step 2: Stop Windows Services
Copy and paste these commands one at a time, pressing Enter after each:
textnet stop wuauserv
net stop cryptSvc
net stop bits
net stop msiserver
Wait for each command to complete before entering the next one. You’ll see a message like “The Windows Update service is stopping” or similar.
Step 3: Rename System Folders
These folders contain temporary update files that may be corrupted. By renaming them, Windows will recreate them fresh.
Enter these commands:
textren C:\Windows\SoftwareDistribution SoftwareDistribution.old
ren C:\Windows\System32\catroot2 catroot2.old
Press Enter after each command. These commands rename folders rather than delete them—if you need to revert, you can easily rename them back.
Step 4: Restart Windows Services
Now restart all the services you stopped. Enter these commands:
textnet start wuauserv
net start cryptSvc
net start bits
net start msiserver
Press Enter after each command. Wait for each to complete. You should see “The [service name] service is starting” messages.
Step 5: Restart Your Computer
- Type exit to close Command Prompt
- Click the Start menu → Power → Restart
- Your computer will restart and Windows will recreate the system folders
- Allow 2-3 minutes for your computer to fully load
Step 6: Test the Fix
- Try signing in to your Windows 11 account
- The sign-in should now proceed without the 0x80080005 error
- If successful, you’ve resolved the issue
- If not, proceed to Method 3
Time to Complete: 10-15 minutes
Risk Level: Low (no system files are deleted, only renamed)
Method 3: Run System File Checker (SFC) Scan
The System File Checker utility scans your entire Windows installation for corrupted system files and automatically repairs them.
Step 1: Open Command Prompt as Administrator
- Press Windows key + S to open the search
- Type Command Prompt
- Right-click and select Run as administrator
- Click Yes in the UAC prompt
Step 2: Execute the SFC Scan
Type the following command exactly and press Enter:
textsfc /scannow
This scan will now begin:
- The scanning process can take 10-20 minutes depending on your system
- Your screen may appear frozen—this is normal
- You’ll see a progress bar at the bottom
- Do not close this window or restart your computer during the scan
Step 3: Review the Results
Once the scan completes, you’ll see one of these messages:
- “Windows Resource Protection did not find any integrity violations” = No corrupted files found
- “Windows Resource Protection found corrupt files and successfully repaired them” = Files were fixed
- “Windows Resource Protection found corrupt files but was unable to fix some of them” = Some files need manual repair (skip to Method 4)
Step 4: Restart Your Computer
- Type exit to close Command Prompt
- Restart your device immediately: Start → Power → Restart
- Allow your computer to complete the restart cycle (this may take slightly longer than usual)
Step 5: Test Sign-In
- Attempt to sign in to your Windows 11 account
- If the error is resolved, you’re done
- If it continues, the next method (DISM) will perform additional repairs
Time to Complete: 20-30 minutes
Risk Level: Very Low (scanning and repair only, no deletions)
Method 4: Run DISM System Image Repair
DISM (Deployment Image Servicing and Management) is a more advanced repair tool that fixes system image issues that SFC might have missed.
Step 1: Open Command Prompt as Administrator
- Click Start and search for Command Prompt
- Right-click and select Run as administrator
- Click Yes in the UAC prompt
Step 2: Execute the DISM Repair Command
Type this command exactly and press Enter:
textDISM /Online /Cleanup-Image /RestoreHealth
What this command does:
- Scans Windows Update files for corruption
- Compares system files against official Windows backup
- Repairs any discrepancies found
- Restores Windows to a known-good state
Step 3: Wait for Completion
- This process typically takes 10-20 minutes
- You’ll see a percentage completion indicator
- The window may appear inactive—this is normal
- Keep the window open until it shows 100% completion
Step 4: Check the Results
Once complete, you’ll see: “The restore operation completed successfully” or “The operation completed successfully”
Step 5: Restart Your Device
- Type exit to close Command Prompt
- Immediately restart: Start → Power → Restart
- Allow extra time (up to 5 minutes) for the system to fully boot
Step 6: Attempt Sign-In
- Log in with your Windows 11 credentials
- Test if the 0x80080005 error still appears
- If resolved, proceed to prevention methods
- If persistent, try Method 5
Time to Complete: 20-30 minutes
Risk Level: Low (repairs Windows components, doesn’t delete user data)
Method 5: Run the Windows Update Troubleshooter
Windows includes a built-in troubleshooter specifically designed to detect and fix update-related errors.
Step 1: Open Settings
- Press Windows key + I to open Settings
- The Settings window will appear
Step 2: Navigate to Update & Security
- Click System in the left sidebar
- Scroll down and click Troubleshoot
- Click Other troubleshooters
Step 3: Run the Troubleshooter
- Under “Other troubleshooters,” locate Windows Update
- Click Windows Update
- Click the Run the troubleshooter button
- The troubleshooter will launch and automatically scan for issues
Step 4: Follow On-Screen Instructions
- The troubleshooter will detect errors
- Follow any prompts it provides
- It may ask to restart your device
- Allow each step to complete fully (this typically takes 5-10 minutes)
Step 5: Review Results
Once complete, the troubleshooter will display:
- Issues found and fixed
- Issues found but unable to fix (rare)
- No issues detected
Step 6: Restart and Test
- If your computer didn’t restart automatically, do so now: Start → Power → Restart
- Attempt to sign in to your Windows 11 account
- Check if the sign-in error is resolved
Time to Complete: 15-20 minutes
Risk Level: Very Low (automated diagnostics only)
Method 6: Boot into Safe Mode and Disable Antivirus
Sometimes third-party antivirus or firewall software interferes with Windows authentication processes, causing error 0x80080005.
Step 1: Boot into Safe Mode
- From the Windows lock screen, hold Shift and click Power → Restart
- On the “Choose an option” screen, select Troubleshoot
- Click Advanced options → Startup Settings → Restart
- Press F5 or the 5 key to enter Safe Mode with Networking
- Log in using your administrator account
Step 2: Disable Your Antivirus (Temporarily)
Once in Safe Mode:
For Windows Defender (Built-in):
- Press Windows key + I to open Settings
- Go to Privacy & security → Windows Security
- Click Virus & threat protection
- Click Manage settings
- Toggle off Real-time protection
For Third-Party Antivirus (Norton, McAfee, Kaspersky, etc.):
- Right-click the antivirus icon in the system tray (bottom-right corner)
- Look for options like “Disable,” “Turn Off,” or “Pause Protection”
- Set the duration to “Until I restart the computer”
Step 3: Test Sign-In in Safe Mode
- Go to the lock screen (Windows key + L)
- Attempt to sign in with your credentials
- If sign-in works in Safe Mode, the antivirus is likely the culprit
Step 4: Boot to Normal Mode and Reconfigure Antivirus
- Restart your computer normally
- Your antivirus will re-enable automatically
- Open your antivirus settings and add Windows system files to the exclusion list
- Consider updating your antivirus to the latest version
Step 5: Test Sign-In Again
- Log out and attempt to sign in normally
- If the error persists, re-enable all antivirus protections—the issue lies elsewhere
- If successful, your antivirus was blocking authentication
Time to Complete: 15-25 minutes
Risk Level: Low (Safe Mode is a diagnostic environment with limited features)
Method 7: Clear Your Microsoft Account Password Cache
If you use a Microsoft account, clearing the cached password and re-entering it can resolve authentication issues caused by corrupted credential data.
Step 1: Open Settings
- Press Windows key + I to open Settings
- Click Accounts in the left sidebar
Step 2: Access Your Account Settings
- Click Your info
- Scroll down to the “Account settings” section
- Click Manage my Microsoft account (this opens in a web browser)
Step 3: Verify Your Account
- You’ll be directed to the Microsoft Account login page
- Enter your email address
- Click Next
- If prompted, verify your identity using a recovery method (phone number, recovery email, or authenticator app)
Step 4: Change Your Microsoft Password
- Click Security tab
- Select Change my password
- Enter your current password
- Create a new password (mix of uppercase, lowercase, numbers, and symbols)
- Re-enter the new password
- Click Save
Step 5: Sign Out and Sign Back In
- Return to your Windows 11 device
- Press Windows key + L to lock your screen
- On the lock screen, click on your account
- Enter your new password (not your old one)
- Press Enter
Step 6: Test the Fix
- You should now be signed in with the new credentials
- The 0x80080005 error should not appear
- If you were previously able to log in but now can’t, the issue may be a forgotten password—use Method 8
Time to Complete: 10-15 minutes
Risk Level: Very Low (password change only)
Method 8: Use Registry Editor to Fix Profile Corruption (Advanced)
This advanced method is for users whose user profile has become corrupted. Only attempt this if previous methods haven’t worked.
Step 1: Boot into Safe Mode
- Hold Shift while clicking Power → Restart from the lock screen
- Select Troubleshoot → Advanced options → Startup Settings
- Press F5 or 5 for Safe Mode
Step 2: Open Registry Editor in Safe Mode
- Press Windows key + R to open the Run dialog
- Type regedit and press Enter
- Click Yes in the User Account Control prompt
Step 3: Navigate to the Profile List
- In Registry Editor, copy and paste this path into the address bar:
textHKEY_LOCAL_MACHINE\SOFTWARE\Microsoft\Windows NT\CurrentVersion\ProfileList
- Press Enter
- You’ll see a list of folders with names like “S-1-5-21-…” (these are user profiles)
Step 4: Identify Duplicate Profiles
- Look for two entries with the same profile path
- One will have a normal name: S-1-5-21-…-1001
- The other will have .bak extension: S-1-5-21-…-1001.bak
- This indicates a corrupted profile that Windows tried to back up
Step 5: Fix the Profile Path
- Right-click the folder with .bak extension
- Select Delete
- Then right-click the other folder (without .bak)
- Locate the ProfileImagePath value on the right side
- Double-click ProfileImagePath to edit it
- If it contains the word “TEMP,” change it to your correct user profile path
- Click OK
Step 6: Fix the RefCount Value
- In the same profile folder, find RefCount
- Right-click it and select Modify
- Change the Value data to 0
- Click OK
Step 7: Close Registry and Restart
- Close Registry Editor
- Go to Start → Power → Restart
- Boot into normal mode (don’t hold Shift)
Step 8: Test Sign-In
- Attempt to log in with your account
- Windows will rebuild your user profile
- This may take 2-5 minutes on first login
- You should no longer see error 0x80080005
Time to Complete: 20-30 minutes
Risk Level: Medium (Registry editing can impact system if done incorrectly—follow steps exactly)
When to Seek Professional Help
If you’ve tried all eight methods and still encounter error 0x80080005, it may be time to seek professional assistance. You should consult a certified Windows technician if:
- None of the methods resolve the error after completing each fully
- Your device won’t boot at all after attempting these fixes
- You’re receiving different error codes after the initial fix attempts
- You’ve accidentally deleted or modified critical system files
- Your device is completely locked and you cannot access any account
- You’re uncomfortable working with Command Prompt or Registry Editor
Professional Support Options
- Microsoft Support: Contact via phone or web support at support.microsoft.com
- Dell/HP/Lenovo Support: If your device is under warranty, contact your manufacturer’s support
- Local IT Technician: Find certified Windows professionals on TechSupport.com or local IT service providers
- Remote Assistance: Consider using services like Windows Remote Assistance for guided troubleshooting
Prevention Tips to Avoid Error 0x80080005 in the Future
Once you’ve resolved this issue, implement these preventative measures:
1. Keep Windows 11 Updated Automatically
- Enable automatic updates: Settings → System → Windows Update → Advanced options → toggle on “Receive updates for other Microsoft products”
- Install security patches within 2 weeks of release
- This ensures critical authentication patches are applied immediately
2. Maintain Regular System Maintenance
- Weekly: Run Disk Cleanup (search “Disk Cleanup” in Start menu)
- Monthly: Update antivirus and firewall software
- Quarterly: Run SFC /scannow as a preventative scan
- Annually: Back up critical files to external drives
3. Configure Your Antivirus Properly
- Add Windows system folders to the antivirus exclusion list:
- C:\Windows\System32
- C:\Windows\SoftwareDistribution
- Update your antivirus to the latest version monthly
- Consider using Windows Defender for optimal Windows 11 compatibility
4. Protect Your Microsoft Account
- Use a strong password (16+ characters with mixed case, numbers, symbols)
- Enable two-factor authentication (2FA)
- Regularly review account security settings at account.microsoft.com
- Keep recovery email and phone number current
5. Monitor Disk Space
- Keep at least 15-20% of your drive free
- Windows needs free space for temporary files and updates
- Delete old backups, temporary files, and unused programs regularly
- Monitor disk space: Settings → System → Storage
6. Create System Restore Points
- Before major updates, create a restore point manually
- Settings → System → About → Advanced system settings → System Protection → Create
- This allows you to revert to a working state if updates fail
7. Perform Regular Backups
- Backup your user profile monthly
- Use Windows Backup: Settings → System → Backup
- Or use third-party tools like Acronis, Macrium Reflect, or AOMEI
- Store backups on external drives or cloud storage
Frequently Asked Questions (FAQ)
Q1: Is Error 0x80080005 the Same as Windows Update Error?
A: Error 0x80080005 primarily affects Windows Update services, but it can also prevent sign-in if the authentication services rely on those system components. The January 2026 security update specifically caused authentication failures, making it appear as a sign-in error. Both are related to the same “Access Denied” issue.
Q2: Will Running These Methods Delete My Files?
A: No. None of these methods delete your personal files, photos, documents, or downloads. Methods 1-7 only repair system files and services. Method 8 (Registry editing) modifies system configuration but doesn’t touch user data. If you choose to reset Windows entirely, you’ll have the option to keep your files.
Q3: How Long Does the SFC Scan Take?
A: The SFC /scannow command typically takes 10-20 minutes, depending on your disk speed and system configuration. SSDs complete faster (10-15 minutes) than traditional hard drives (15-20 minutes). Do not interrupt the process.
Q4: Can I Use My Device While Running These Fixes?
A: For Methods 1-6 and 8, your device must be restarted, so you won’t be able to use it during the actual repair process. For Method 7 (password change), you’ll need internet access to verify your Microsoft account, but you can use your device between steps.
Q5: What’s the Difference Between SFC and DISM Scans?
A: SFC scans only your currently installed Windows files, while DISM compares your system against Microsoft’s official Windows image files stored on Windows Update servers. DISM is more comprehensive and can fix issues that SFC might miss. Always run SFC first, then DISM if needed.
Q6: Is It Safe to Rename the SoftwareDistribution Folder?
A: Yes, it’s completely safe. Windows automatically recreates this folder with a fresh set of update files. The .old folder is harmless—you can delete it after confirming the fix works (though it’s not necessary). Renaming (not deleting) ensures you can revert if needed.
Q7: Why Should I Disable Antivirus if It Protects My PC?
A: Antivirus software sometimes blocks legitimate Windows system processes during authentication. Disabling it temporarily helps identify if it’s the culprit. You should re-enable it immediately afterward. Never leave antivirus disabled permanently—this leaves your system vulnerable to malware.
Q8: Can I Fix This Error Without Using Command Prompt?
A: Methods 1, 5, and 7 don’t require Command Prompt. However, Methods 2, 3, and 4 specifically use Command Prompt because it’s the most reliable way to execute system repairs. If you’re uncomfortable with Command Prompt, attempt Methods 1, 5, 7, and 6 first before trying the command-based methods.
Q9: Will These Fixes Work on Windows 10?
A: Most methods will work on Windows 10, but this guide is specifically for Windows 11. The January 2026 KB5074109 update mentioned here is Windows 11-specific. For Windows 10 users experiencing error 0x80080005, Methods 2-4 and 6-8 will still be effective.
Q10: How Do I Know If the Fix Worked?
A: After each method, attempt to sign in to your Windows 11 account. If you can successfully enter your password and access your desktop without seeing “Error 0x80080005,” the fix has worked. Test sign-in at least twice to confirm it’s not a one-time occurrence.
Conclusion
Windows 11 error 0x80080005 is a frustrating “Access Denied” issue that can prevent you from signing in or updating your system. Whether caused by corrupted system files, disabled update services, recent security patches, or profile corruption, this comprehensive guide provides eight proven solutions to restore your device’s functionality.
Start with the quickest fixes first (Methods 1 and 5), then progress through the more technical methods if needed. Most users will find resolution within the first two or three methods. The January 2026 security fix (KB5077744) specifically addresses authentication failures for recent Windows 11 installations.
If these methods don’t resolve your issue, don’t hesitate to contact Microsoft Support or a certified Windows technician—attempting fixes beyond these eight methods could cause additional system complications. Remember that professional support is always available if you need it.
Once resolved, implement the prevention tips to avoid this error in the future. Regular Windows updates, antivirus management, and system maintenance will keep your Windows 11 device running smoothly and securely. Your device should now sign in without errors and install updates reliably.
For more technical support and Windows troubleshooting guides, visit https://techtablepro.com/ for expert IT advice and step-by-step tutorials.